

What is a service account?
A service account is a non-personal account used to manage API keys for automated or shared operations. Unlike user accounts, service accounts are not tied to an individual’s email address or login credentials. They are ideal for:- Operational continuity
- Shared access across teams
- Reducing risk when team members leave or change roles
Service account best practices
- Use service accounts for all automated or shared API integrations.
- Create different service accounts, with their unique API keys, for each role on the platform.
- Limit permissions to those necessary.
- Rotate keys periodically and revoke unused ones.
- Keep a record of who has access to each key.
Service account versus user account
Service account permissions and actions
The following table lists some of the key service account permissions and actions.You can look up a complete list of permissions and actions, that are available to your organisation on the platform,
when adding, editing, or viewing service accounts, under Settings > Service accounts.
Create a service account
Only Account Controllers can create service accounts.
1
Add a new account
In the menu at the top of the screen, click Settings. Under Organisation settings, select Service accounts and click Add new.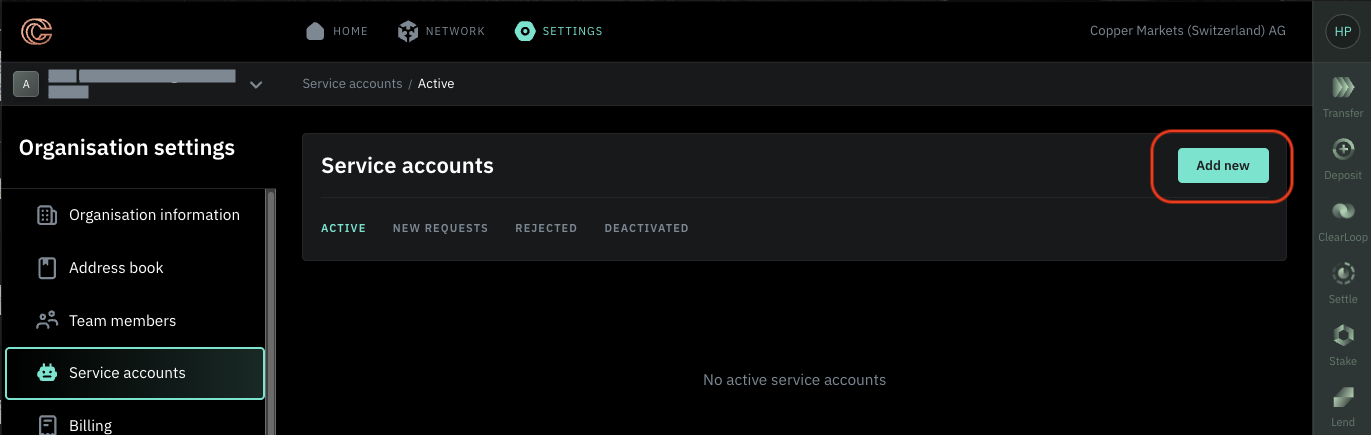
2
Give the account a name
Give the new service account a name (for example, Finance Ops, Trading Bot) and click Next.
3
Begin granting permissions
To assign required permissions to the account, on the Permissions page, click Grant permissions.
4
Choose permissions
On the Grant account permissions page, select the accounts that the account is authorised to access and its permissions,
for example, Trader, Loan Manager, Withdrawal Operator. Click Save.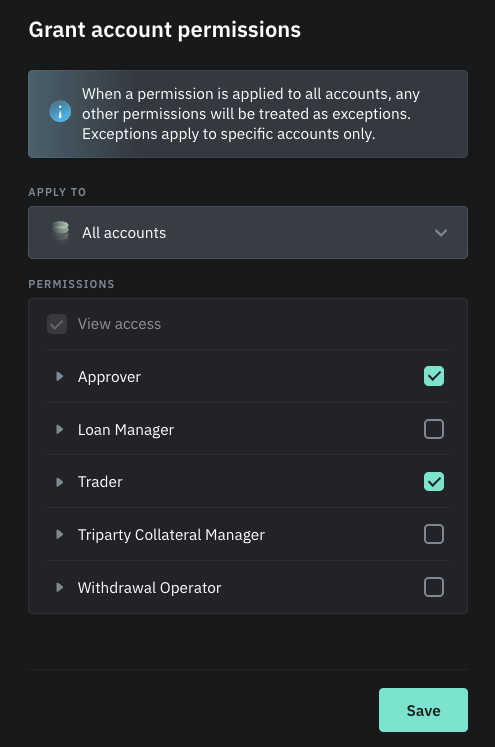
To view the full list of permitted actions for a permission, click the drop-down arrow next to the permission.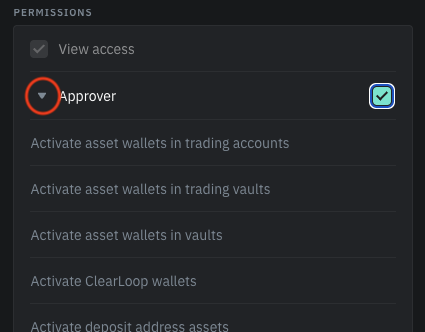
5
Add order limits for an account or accounts
To add order limits, on the Order limits page, click Add Limit, and set order limits.
- Choose an account or accounts that the limits will apply to.
-
Define the maximum individual order amount that, when exceeded, will require approval.
Select how many approvals are required. Optionally, you can select specific team members to approve those orders. -
Define the maximum amount per time period that, when exceeded, will require approval.
Select how many approvals are required. Optionally, you can select specific team members to approve those orders.
6
Add order limits for a different account
If you want to set limits for another account or accounts, click Add another and repeat the steps for setting order limits.
Once you have set all the limits, click Save.
Once you have set all the limits, click Save.
7
Review the account details
On the Summary page, review the details of the account and click Confirm.
Depending on your approval workflow, the Platform Authorised User and/or Account Controller will receive a notification,
both on the Copper Platform and via email, to approve the new account.